后端JAVA开发
下载IDE
系统推荐使用的IDE为IDEA,您也可以使用您熟悉的IDE,如Eclipse、VSCode等
导入项目
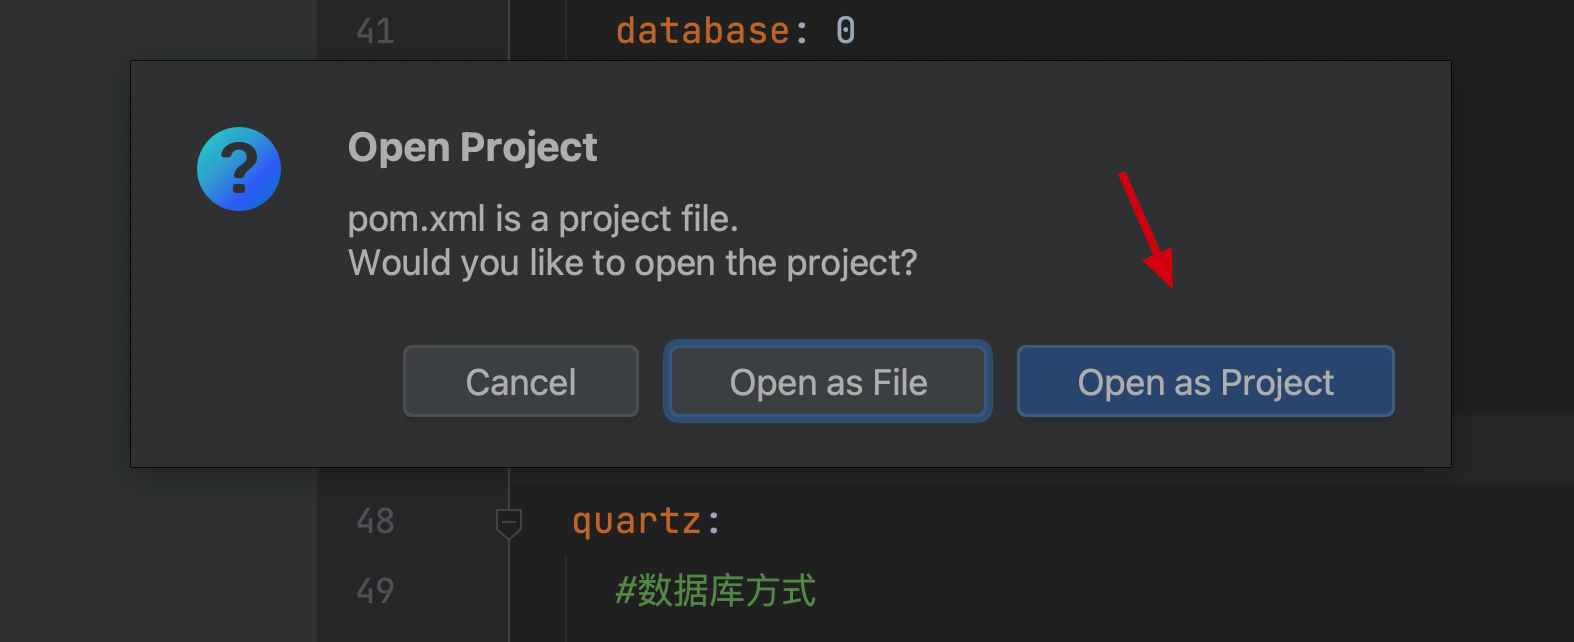
IntelliJ IDEA > File > Open > 选择项目根目录下的pom.xml  选择Open as Project
编译项目
选择右侧Maven工具栏,在根位置双击install对整个项目进行编译 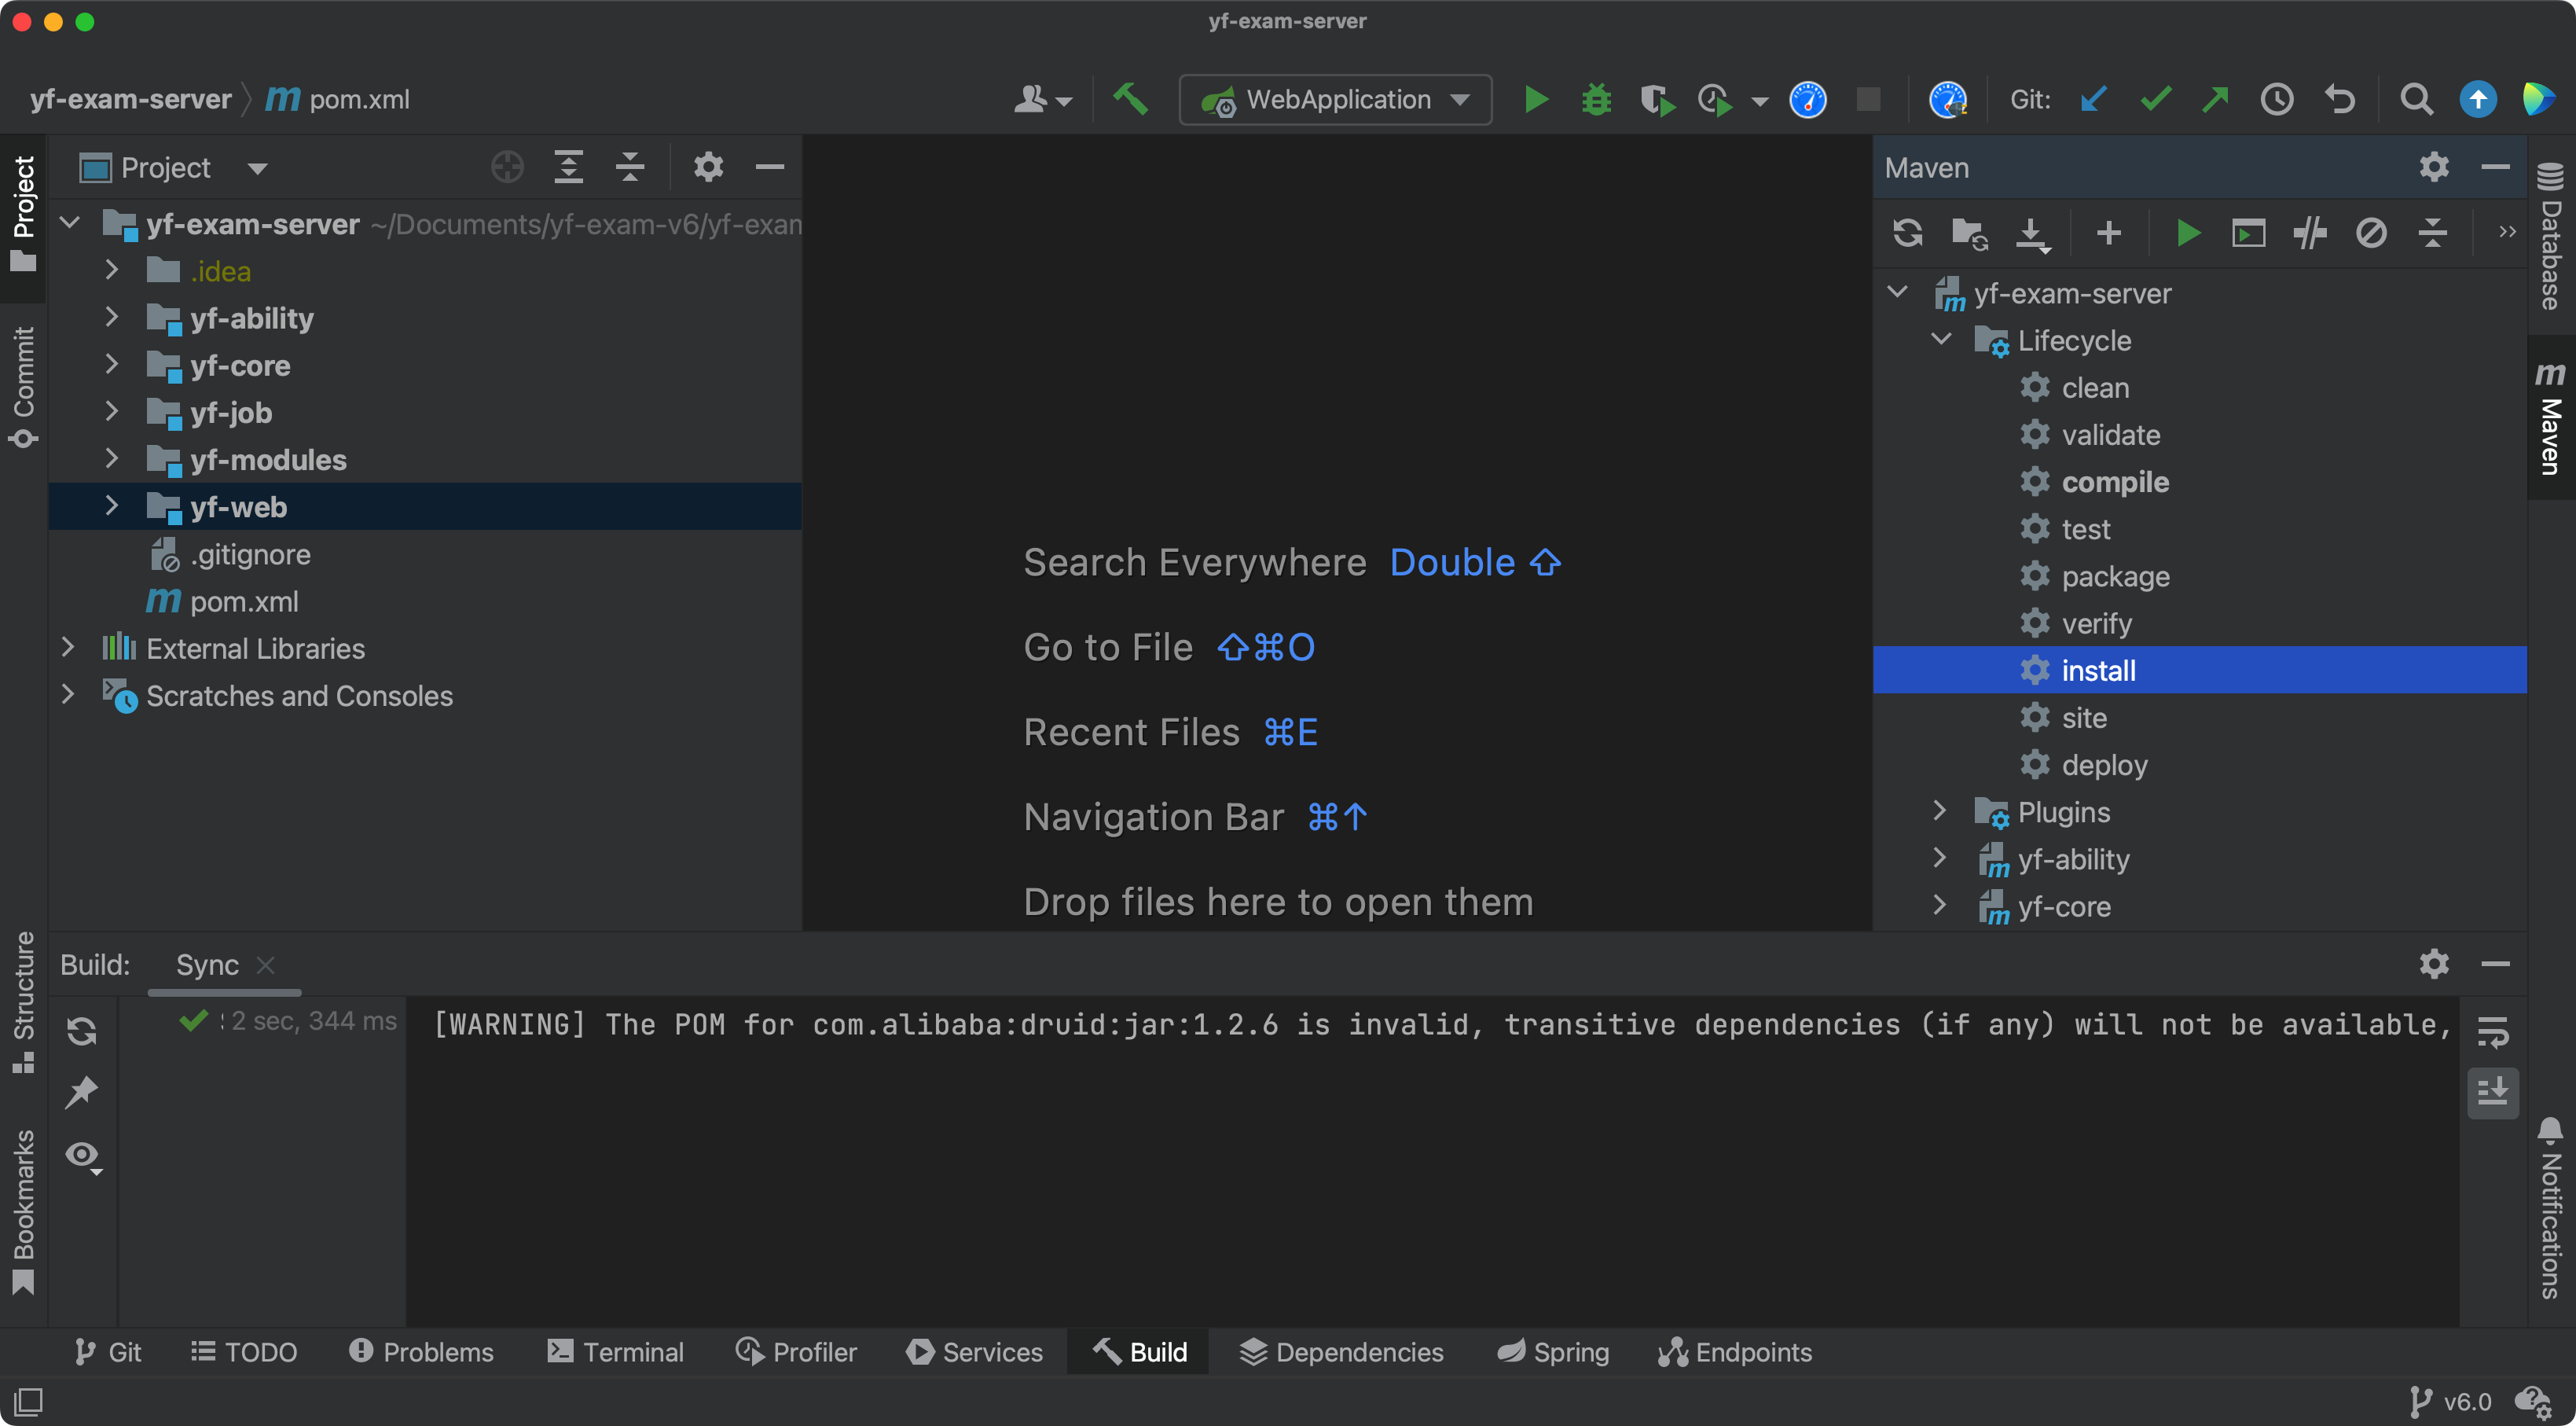
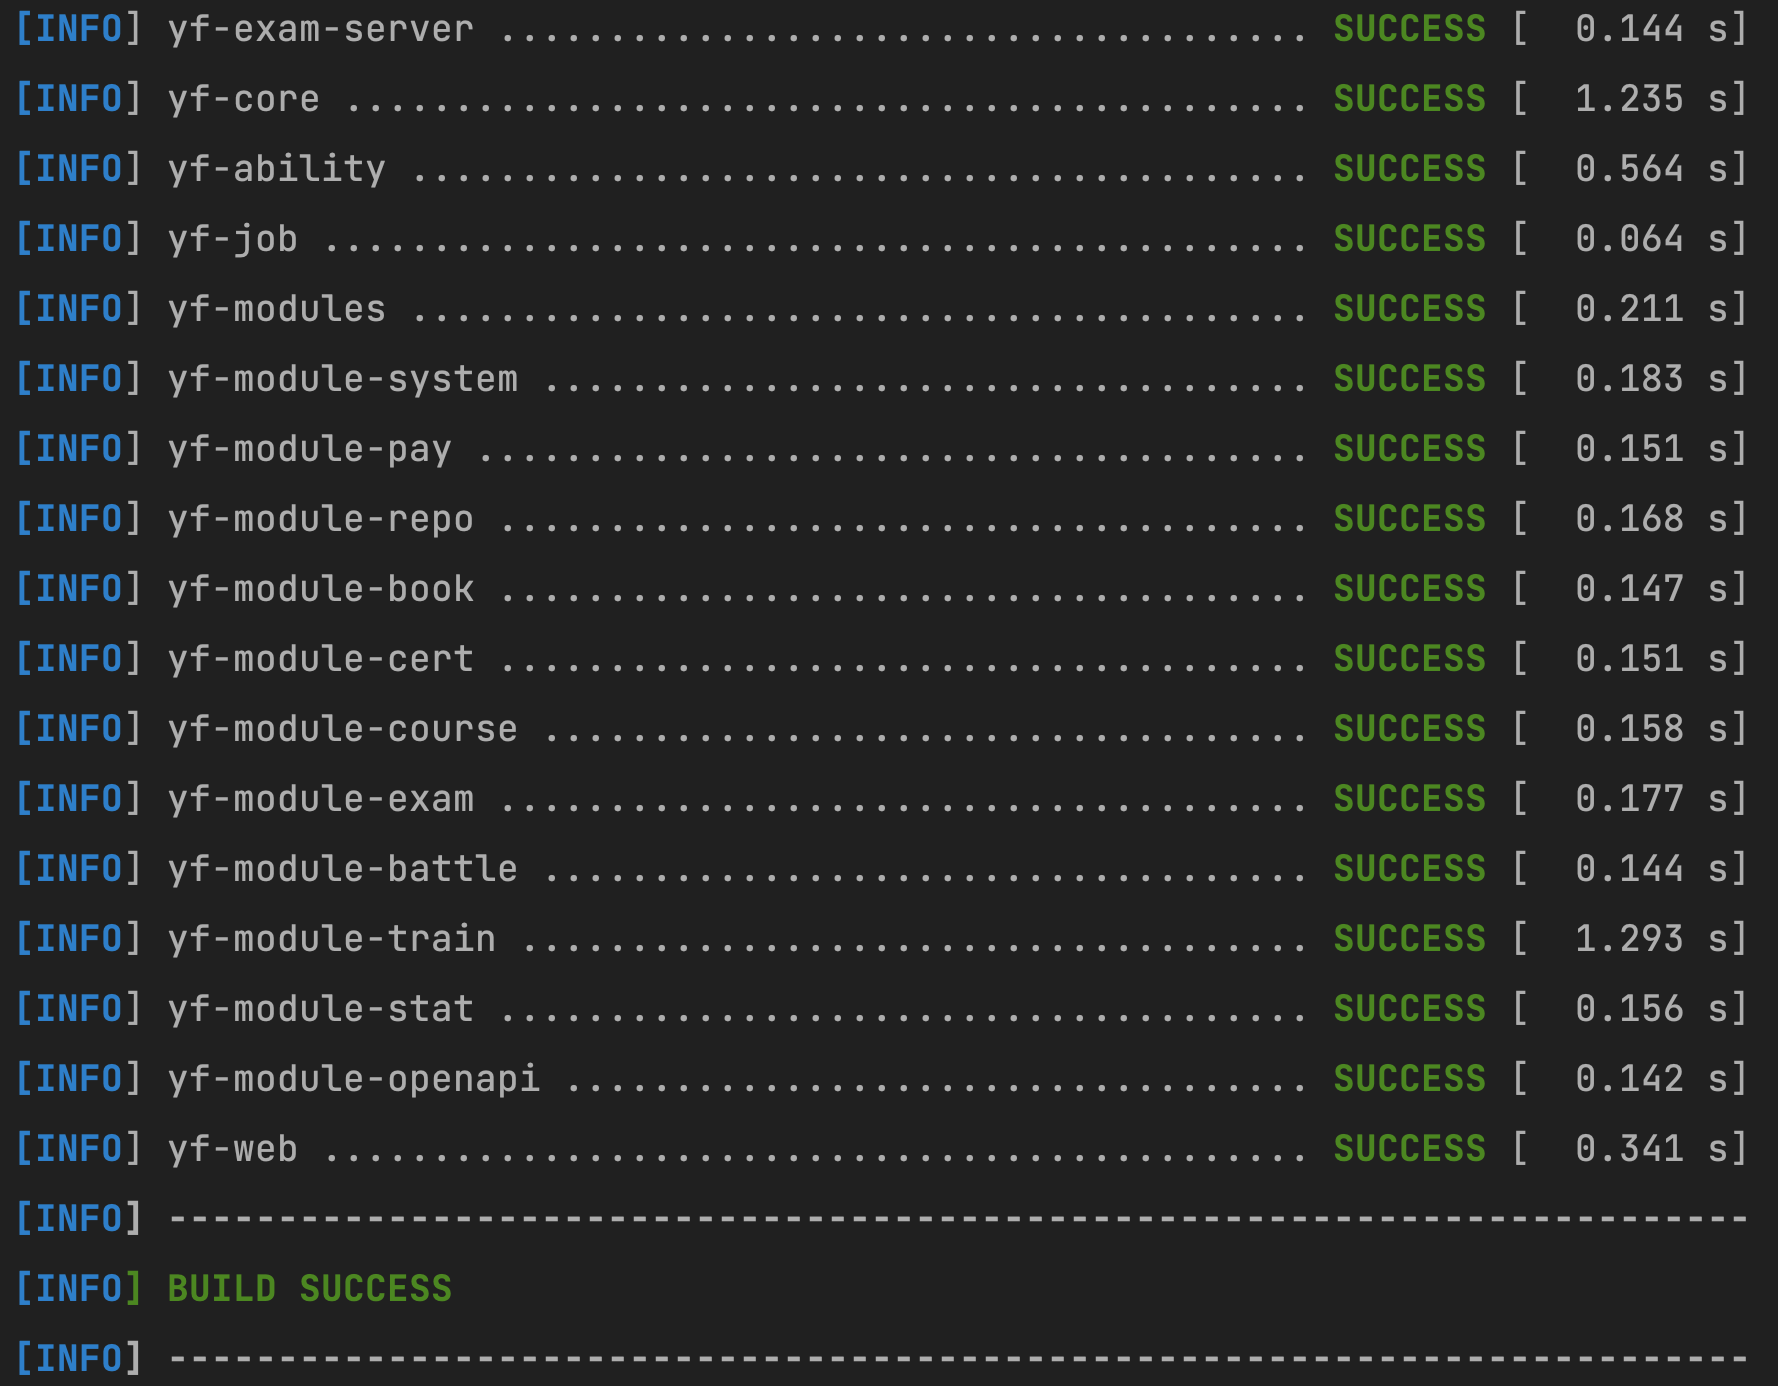
显示如下信息则表示全部编译完成
注:项目数量根据产品的不同版本可能不一致,但整体的结构是一致的
开发和调试
首先了解一下项目的目录结构,如下:
随着版本迭代项目名称或者数量可能存在变化,但整体结构是不变的
├── pom.xml                        最外层的pom项目文件,统一版本引用
├── yf-ability                     公共能力模块:验证码/基础配置/人脸/文件上传/权限等
├── yf-core                        基础模块:接口规范/异常处理/工具类等
├── yf-job                         定时任务模块:SpringQuartz统一任务管理
├── yf-modules                     业务模块
│  ├── yf-module-activity          活动报名模块
│  ├── yf-module-battle            知识竞赛模块
│  ├── yf-module-cert              证书模块
│  ├── yf-module-course            课程模块
│  ├── yf-module-exam              在线考试模块
│  ├── yf-module-mall              积分商城模块
│  ├── yf-module-notify            消息通知模块
│  ├── yf-module-openapi           开放接口模块
│  ├── yf-module-pay               支付模块
│  ├── yf-module-repo              题库模块:试题管理/题库训练/错题本
│  ├── yf-module-stat              统计模块
│  ├── yf-module-survey            问卷调查模块
│  └── yf-module-system            系统模块:用户/角色/架构/群组/公告/数据字典等
└── yf-web                         前端接口业务调用模块:Web项目,开放业务接口
修改配置文件 默认的本地调试文件配置为:yf-web/src/main/resources/application-dev.yml
# 完整的外挂配置文件,修改配置无需重新打包
server:
  port: 8101
  # 启用服务端压缩
  compression:
    enabled: true
    min-response-size: 10
    mime-types: application/json,application/xml,text/html,text/xml,text/plain,application/javascript,text/css

spring:
  application:
    name: yf-exam-api
  profiles:
    active: dev
  main:
    allow-bean-definition-overriding: true
  # 数据库配置
  datasource:
    type: com.alibaba.druid.pool.DruidDataSource
    driver-class-name: com.mysql.cj.jdbc.Driver
    url: jdbc:mysql://127.0.0.1:3306/yf_exam?useUnicode=true&characterEncoding=UTF-8&useSSL=false&serverTimezone=Asia/Shanghai&allowPublicKeyRetrieval=true
    username: root
    password: root
    filters: stat
    max-active: 1000
    initial-size: 10
    max-wait: 6000
    min-idle: 1
    time-between-eviction-runs-millis: 60000
    min-evictable-idle-time-millis: 300000
    test-while-idle: true
    test-on-borrow: false
    test-on-return: false
    pool-prepared-statements: true
    max-open-prepared-statements: 1000
    async-init: true

  # Redis配置
  redis:
    database: 0
    host: 127.0.0.1
    port: 6379
    password:
    timeout: 5000

  # 定时任务配置
  quartz:
    #数据库方式
    job-store-type: jdbc
    # quartz 相关属性配置
    properties:
      org:
        quartz:
          scheduler:
            instanceName: examScheduler
            instanceId: AUTO
          jobStore:
            class: org.quartz.impl.jdbcjobstore.JobStoreTX
            driverDelegateClass: org.quartz.impl.jdbcjobstore.StdJDBCDelegate
            tablePrefix: QRTZ_
            isClustered: true
            clusterCheckinInterval: 10000
            useProperties: false
          threadPool:
            class: org.quartz.simpl.SimpleThreadPool
            threadCount: 10
            threadPriority: 5
            threadsInheritContextClassLoaderOfInitializingThread: true

# 文档转换,请先安装LibreOffice,再配置相应路径,enabled=true
jodconverter:
  local:
    enabled: false
    office-home: /opt/libreoffice6.4
    max-tasks-per-process: 10
    port-numbers: 8100

# 支付配置
pay:
  # 支付实例,修改enabled为true则打开,false则关闭
  providers:
    - name: wechat
      enabled: true
    - name: alipay
      enabled: true

  wechat:
    # AppId,通常为wx开头的18位左右字符
    app-id:
    # App秘钥
    app-secret:
    # 商户号,通常为10位数字
    mch-id:
    # 商户API私钥。商户申请商户API证书时,会生成商户私钥,并保存在本地证书文件夹的文件apiclient_key.pem中
    private-key:
    # API v3密钥。为了保证安全性,微信支付在回调通知和平台证书下载接口中,对关键信息进行了AES-256-GCM加密。API v3密钥是加密时使用的对称密钥。商户可以在【商户平台】->【API安全】的页面设置该密钥。
    api-v3-key:
    # 证书序列号。每个证书都有一个由CA颁发的唯一编号,即证书序列号。如何查看证书序列号请看这里 https://wechatpay-api.gitbook.io/wechatpay-api-v3/chang-jian-wen-ti/zheng-shu-xiang-guan#ru-he-cha-kan-zheng-shu-xu-lie-hao
    mch-serial-no:
    # 支付回调地址
    notify-url:

  # 支付宝支付
  alipay:
    # 应用ID,您的APPID,收款账号既是您的APPID对应支付宝账号
    app-id:
    # 商户私钥,您的PKCS8格式RSA2私钥
    merchant-private-key:
    # 支付宝公钥,查看地址:https://openhome.alipay.com/platform/keyManage.htm 对应APPID下的支付宝公钥。
    alipay-public-key:
    # 服务器异步通知页面路径  需http://格式的完整路径,不能加?id=123这类自定义参数,必须外网可以正常访问
    notify-url:
    # 服务器同步通知页面路径  需http://格式的完整路径,不能加?id=123这类自定义参数,必须外网可以正常访问
    return-url:
    # 签名方式
    sign-type: RSA2

# 基础配置
ycloud:
  # 运行模式,ture为演示/false为正式
  demo: false
  # 开放接口秘钥
  open-secret: JoQEJeD7grF8JdyVaOCvPDNL8arsyvfL
  # 微信登录成功以后,将token推送到这个链接同步登录
  login-sync-pc: https://yourdomain.com/#/sync/{token}/{roleType}
  # 微信登录成功以后,将token推送到这个链接同步登录
  login-sync-h5: https://yourdomain.com/#/pages/login/sync?token={token}
  # 微信获取code以后回调此URL
  login-redirect: https://yourdomain.com/api/common/wx/redirect

# 微信相关配置
wechat:
  login:
    # 小程序登录appId
    mp-app-id:
    mp-app-secret:
    # 网站登录appId
    site-app-id:
    site-app-secret:


# 企业微信
crop-wechat:
  login:
    crop-id:
    agent-id:
    crop-secret:
    redirect: https://yourdomain.com/api/common/crop-wechat/redirect

# 钉钉
ding-talk:
  login:
    app-key:
    app-secret:
    redirect: https://yourdomain.com/api/common/ding-talk/redirect

# 生产环境建议关闭文档
# 文档访问地址:http://localhost:8101/doc.html
swagger:
  enable: false

logging:
  level:
    root: error
  # 日志文件目录
  path: logs/${spring.application.name}/
核心配置有数据库连接配置/Redis配置
运行入口项目为yf-web,此项目为提供给前端的接口项目,执行右侧maven工具
yf-web > Plugins > spring-boot > spring-boot:run
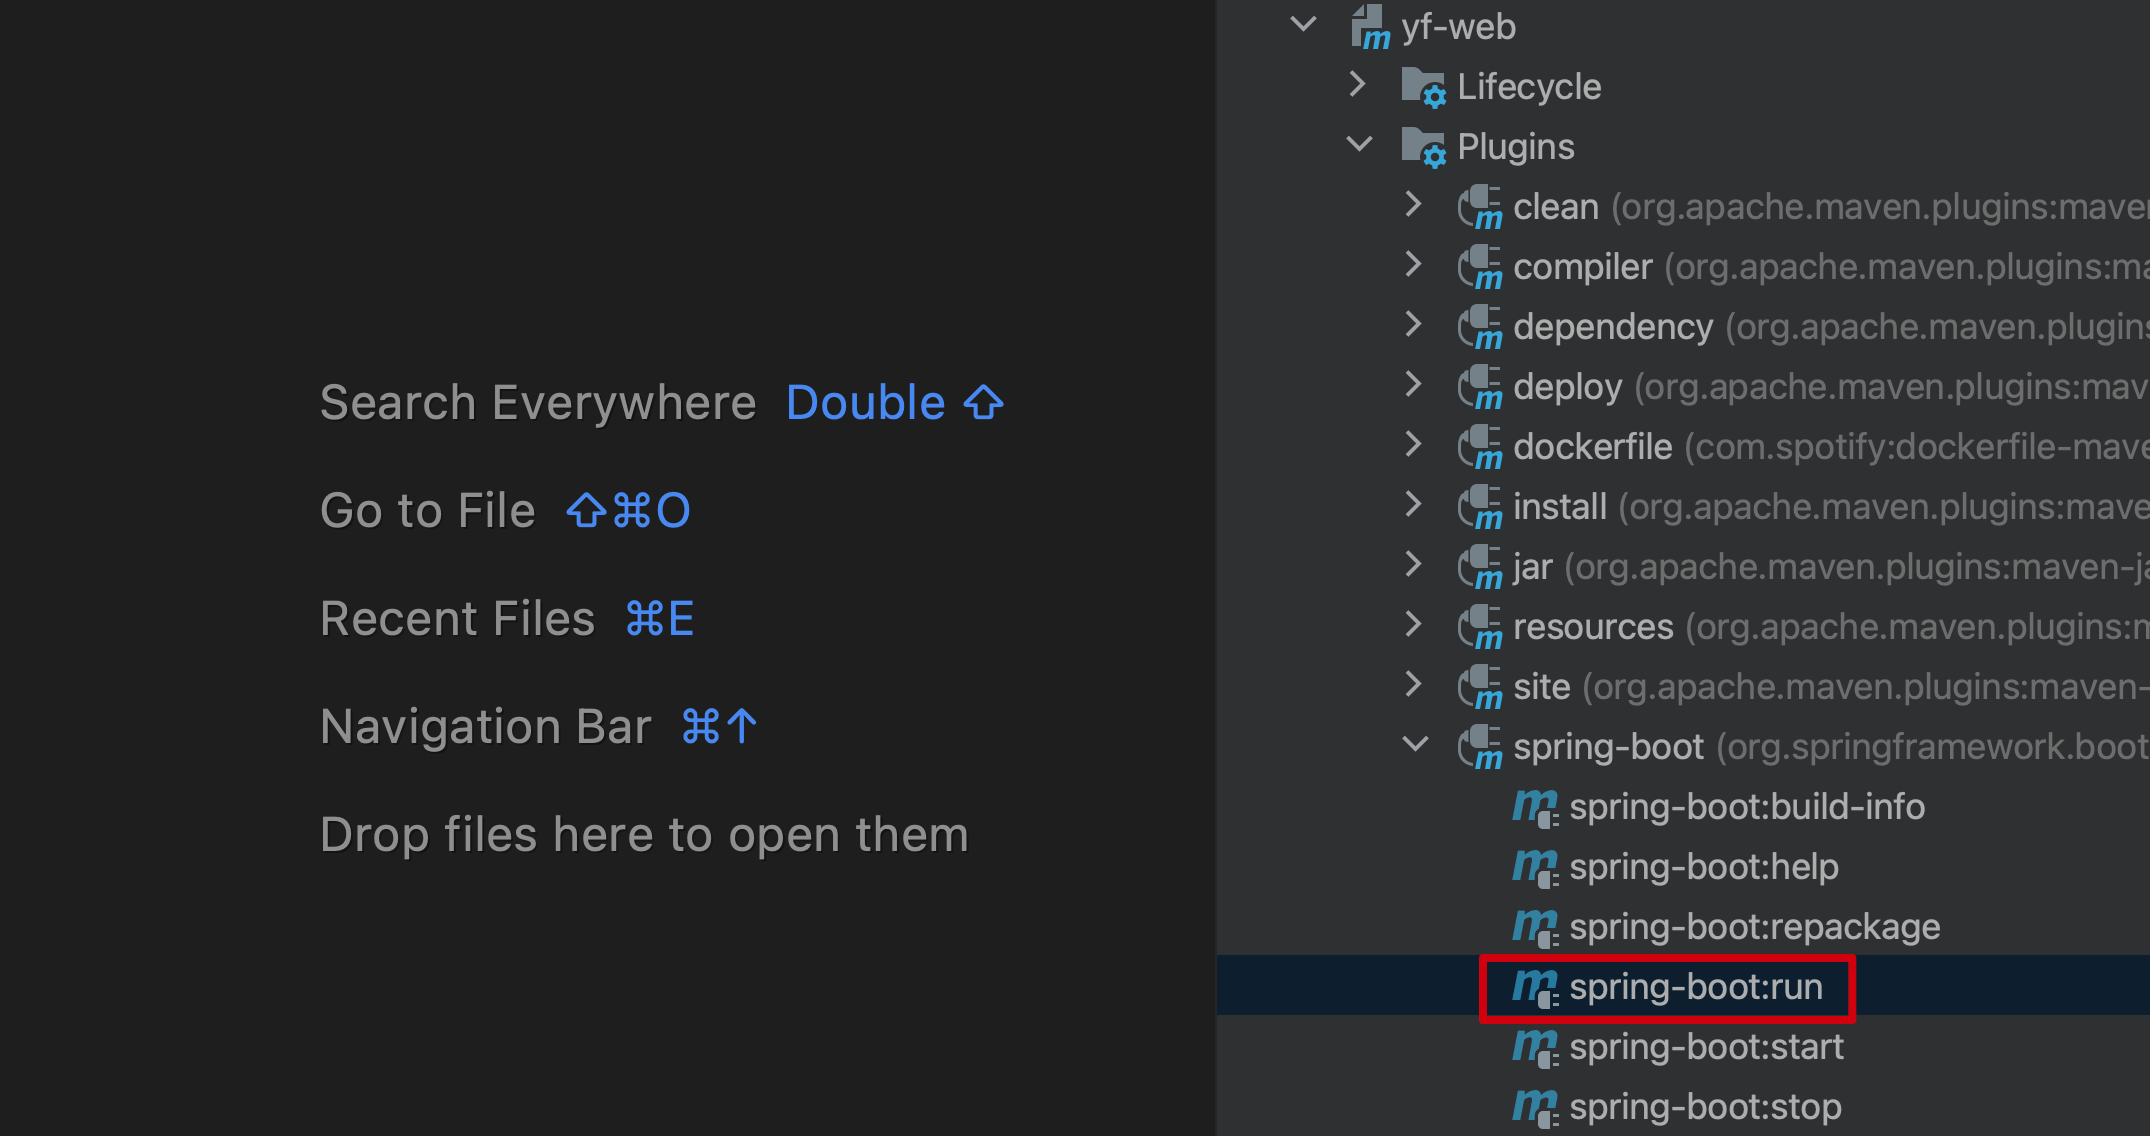
即可启动项目,启动后显示如下: 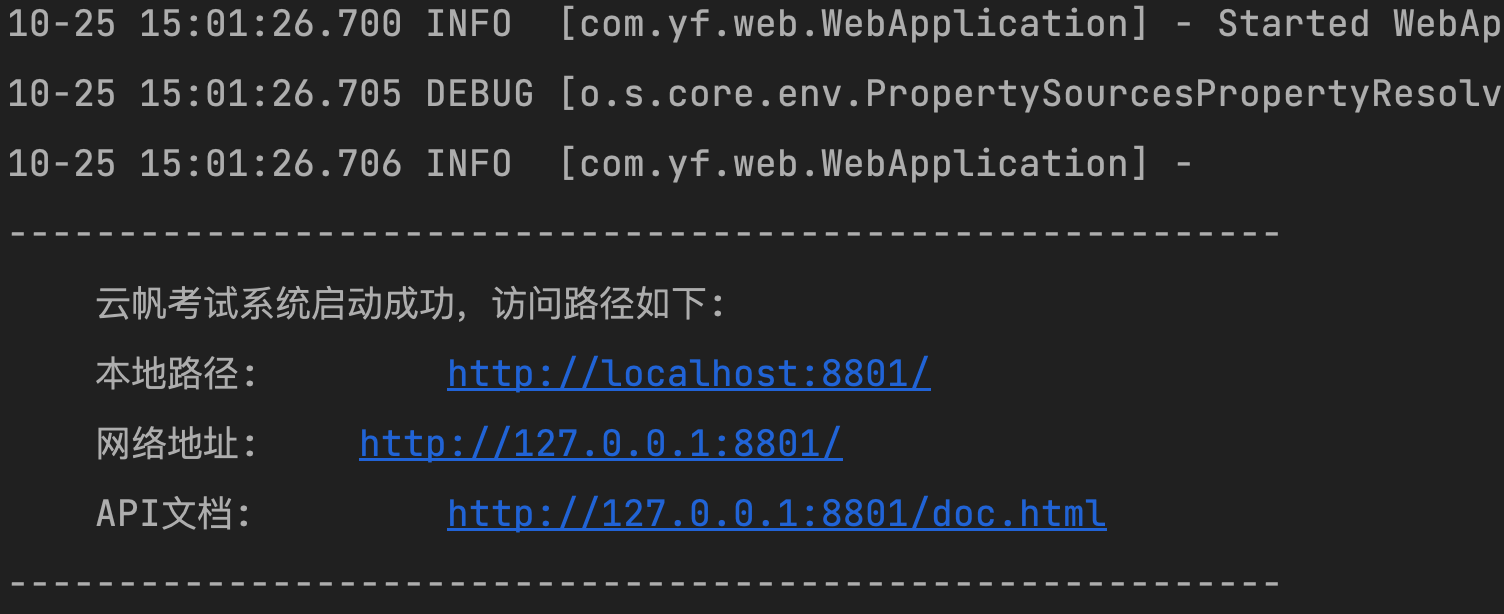
项目接口调用地址为:http://localhost:8801/
项目接口文档地址为:http://127.0.0.1:8801/doc.html
打包发行包
右侧Maven工具栏选择yf-web项目,执行下面的package即可打包发行包,此项目引用了所有项目功能,并提供前端交互的接口等 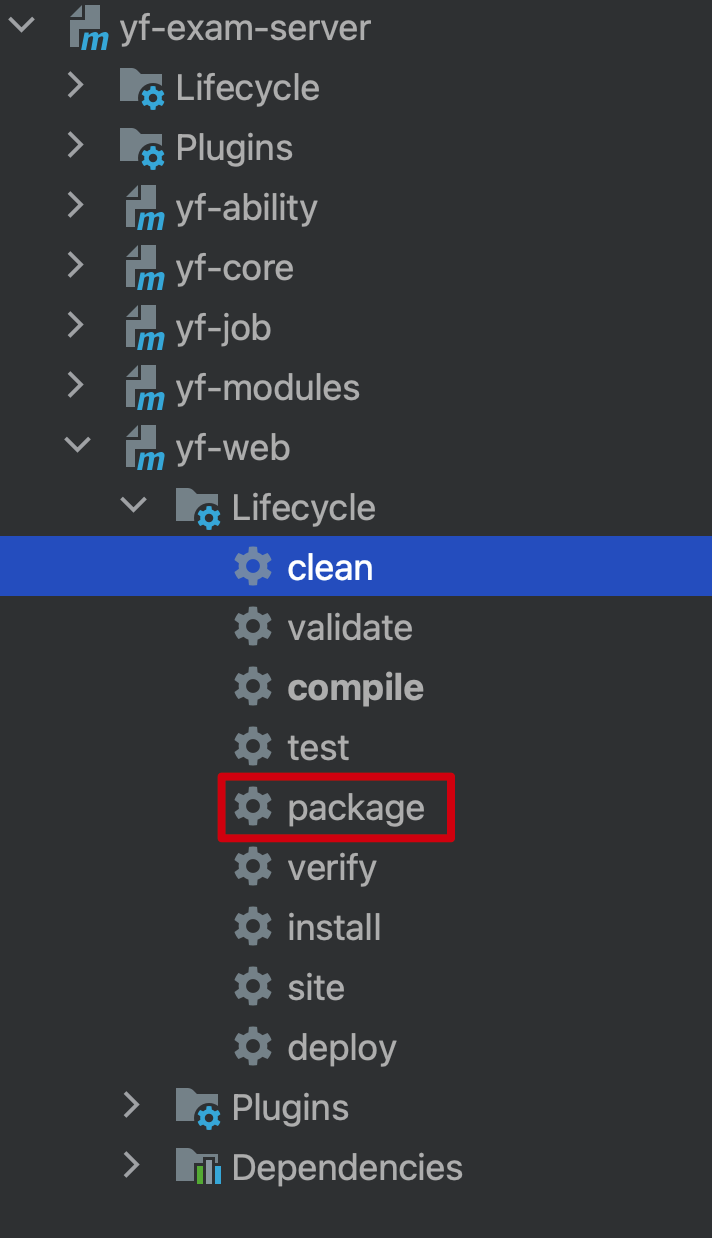
执行完成后,在项目的根目录会产生target文件夹,里面的yf-exam-api.jar即为发行包 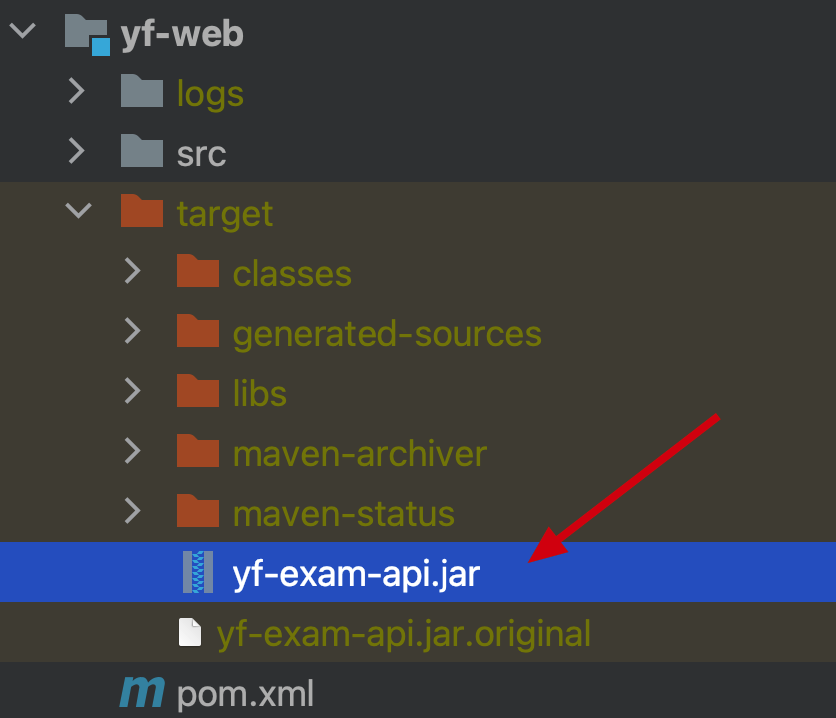
因为我们的配置文件采用外置模式,所以不需要修改任何配置信息,直接打包即可