考试系统配置
考试系统相关的配置、如修改配置文件、初始化数据库、Nginx代理配置、注册系统服务等
上传部署资源
安装资源包通过邮件的方式交付到客户手上,默认位置为:docs
├── docs
│   ├── WinService
│   │   ├── ReadMe.txt
│   │   ├── yf-exam.exe
│   │   └── yf-exam.xml
│   ├── db
│   │   └── yf_exam_xxx.sql
│   ├── run
│   │   ├── application-local.yml
│   │   ├── dist.zip
│   │   ├── h5.zip
│   │   ├── readme.txt
│   │   ├── start.bat
│   │   ├── start.sh
│   │   └── yf-exam-api.jar
│   └── 用户手册&部署文档.pdf
├── exam-xxxx-server   后端接口JAVA项目
├── exam-xxxx-uni      移动端UNI-APP项目
└── exam-xxxx-vue      PC管理端VUE项目
初始化数据库
将docs/部署资源/db/yf_exam_xxx.sql上传到服务器上
如:我们上传到服务器并重命名,最终路径为:/data/run/db.sql
# 登录数据库
mysql -uroot -p
# 创建数据库
create database yf_exam default character set utf8mb4 collate utf8mb4_general_ci;
# 导入数据,脚本可以放在任意位置
use yf_exam;
source /data/run/db.sql
配置后端程序
将docs/部署资源/run/目录上传至服务器
如,我们传到服务器的:/data/run/下面
# 后端外置配置文件
/data/run/application-local.yml
# 后端服务器JAVA程序
/data/run/yf-exam-api.jar
# PC学员端+管理端静态页面
/data/run/dist.zip
# H5学员端页面
/data/run/h5.zip
我们将dist.zip 和 h5.zip解压
unzip dist.zip
unzip h5.zip
# 如果解压命令无效,使用以下命令安装即可
yum install unzip
最终/data/run/目录结构为
# 后端外置配置文件
/data/run/application-local.yml
# 后端服务器JAVA程序
/data/run/yf-exam-api.jar
# PC学员端+管理端静态页面
/data/run/dist.zip
/data/run/dist
# H5学员端页面
/data/run/h5.zip
/data/run/h5
配置文件总览
打开/data/run/application-local.yml
# 完整的外挂配置文件,修改配置无需重新打包
server:
  port: 8101
  # 启用服务端压缩
  compression:
    enabled: true
    min-response-size: 10
    mime-types: application/json,application/xml,text/html,text/xml,text/plain,application/javascript,text/css

spring:
  application:
    name: yf-exam-api
  profiles:
    active: dev
  main:
    allow-bean-definition-overriding: true
  # 数据库配置
  datasource:
    type: com.alibaba.druid.pool.DruidDataSource
    driver-class-name: com.mysql.cj.jdbc.Driver
    url: jdbc:mysql://127.0.0.1:3306/yf_exam?useUnicode=true&characterEncoding=UTF-8&useSSL=false&serverTimezone=Asia/Shanghai&allowPublicKeyRetrieval=true
    username: root
    password: root
    # druid相关配置
    druid:
      max-active: 5000
      initial-size: 20
      min-idle: 5
      async-init: true
      # 监控统计
      filters: stat,wall
      filter:
        stat:
          log-slow-sql: true
          slow-sql-millis: 5000
        wall:
          config:
            create-table-allow: false
            alter-table-allow: false
            drop-table-allow: false
            truncate-allow: false

  # Redis配置
  redis:
    database: 0
    host: 127.0.0.1
    port: 6379
    password:
    timeout: 5000

  # 定时任务配置
  quartz:
    #数据库方式
    job-store-type: jdbc
    # quartz 相关属性配置
    properties:
      org:
        quartz:
          scheduler:
            instanceName: examScheduler
            instanceId: AUTO
          jobStore:
            class: org.quartz.impl.jdbcjobstore.JobStoreTX
            driverDelegateClass: org.quartz.impl.jdbcjobstore.StdJDBCDelegate
            tablePrefix: QRTZ_
            isClustered: true
            clusterCheckinInterval: 10000
            useProperties: false
          threadPool:
            class: org.quartz.simpl.SimpleThreadPool
            threadCount: 10
            threadPriority: 5
            threadsInheritContextClassLoaderOfInitializingThread: true

# 文档转换,请先安装LibreOffice,再配置相应路径,enabled=true
jodconverter:
  local:
    enabled: false
    office-home: /opt/libreoffice6.4
    max-tasks-per-process: 100
    port-numbers: 8100
ycloud:
  # 运行模式,ture为演示/false为正式
  demo: false
  # 允许跨域调用的域名,有安全要求的请配置,如:https://exam.yfhl.net
  allowed-origin: '*'
  # 开放接口秘钥
  open-secret: JoQEJeD7grF8JdyVaOCvPDNL8arsyvfL
  # 微信登录成功以后,将token推送到这个链接同步登录
  login-sync-pc: https://yourdomain.com/sync?token={token}
  # 微信登录成功以后,将token推送到这个链接同步登录
  login-sync-h5: https://yourdomain.com/pages/login/sync?token={token}

# 支付配置
pay:
  # 支付实例,修改enabled为true则打开,false则关闭
  providers:
    - name: wechat
      enabled: true
    - name: alipay
      enabled: true
    - name: paypal
      enabled: true

  wechat:
    # AppId,通常为wx开头的18位左右字符
    app-id:
    # App秘钥
    app-secret:
    # 商户号,通常为10位数字
    mch-id:
    # 商户API私钥。商户申请商户API证书时,会生成商户私钥,并保存在本地证书文件夹的文件apiclient_key.pem中
    private-key:
    # API v3密钥。为了保证安全性,微信支付在回调通知和平台证书下载接口中,对关键信息进行了AES-256-GCM加密。API v3密钥是加密时使用的对称密钥。商户可以在【商户平台】->【API安全】的页面设置该密钥。
    api-v3-key:
    # 证书序列号。每个证书都有一个由CA颁发的唯一编号,即证书序列号。如何查看证书序列号请看这里 https://wechatpay-api.gitbook.io/wechatpay-api-v3/chang-jian-wen-ti/zheng-shu-xiang-guan#ru-he-cha-kan-zheng-shu-xu-lie-hao
    mch-serial-no:
    # 支付回调地址
    notify-url: https://yourdomain.com/api/pay/wechat/notify

  # 支付宝支付
  alipay:
    # 应用ID,您的APPID,收款账号既是您的APPID对应支付宝账号
    app-id:
    # 商户私钥,您的PKCS8格式RSA2私钥
    merchant-private-key:
    # 支付宝公钥,查看地址:https://openhome.alipay.com/platform/keyManage.htm 对应APPID下的支付宝公钥。
    alipay-public-key:
    # 服务器异步通知页面路径  需http://格式的完整路径,不能加?id=123这类自定义参数,必须外网可以正常访问
    notify-url: https://yourdomain.com/api/pay/alipay/notify
    # 服务器同步通知页面路径  需http://格式的完整路径,不能加?id=123这类自定义参数,必须外网可以正常访问
    return-url: https://yourdomain.com/api/pay/alipay/return
    # 签名方式
    sign-type: RSA2

  # Paypal支付配置
  paypal:
    mode: sandbox
    app:
    secret:
    return-url: https://yourdomain.com/api/pay/paypal/query
    cancel-url: https://yourdomain.com/api/pay/paypal/cancel
    # 该标签将覆盖PayPal网站上PayPal帐户中的公司名称
    brand: 云帆互联

# 微信相关配置
wechat:
  login:
    # 小程序登录appId
    mp-app-id:
    mp-app-secret:
    # 网站登录appId
    site-app-id:
    site-app-secret:
    # 登录跳转地址
    redirect: https://yourdomain.com/api/common/wx/redirect
    # 绑定微信响应
    bind-redirect: https://yourdomain.com/api/common/wx/bind


# 企业微信
crop-wechat:
  login:
    crop-id:
    agent-id:
    crop-secret:
    redirect: https://yourdomain.com/api/common/crop-wechat/redirect
    bind-redirect: https://yourdomain.com/api/common/crop-wechat/bind

# 钉钉
ding-talk:
  login:
    app-key:
    app-secret:
    redirect: https://yourdomain.com/api/common/ding-talk/redirect
    bind-redirect: https://yourdomain.com/api/common/ding-talk/bind

# 生产环境建议关闭文档
# 文档访问地址:http://localhost:8101/doc.html
swagger:
  enable: false

logging:
  level:
    root: error
  # 日志文件目录
  path: logs/${spring.application.name}/
修改数据库配置
  # 数据库配置
  datasource:
    type: com.alibaba.druid.pool.DruidDataSource
    driver-class-name: com.mysql.cj.jdbc.Driver
    url: jdbc:mysql://127.0.0.1:3306/yf_exam?useUnicode=true&characterEncoding=UTF-8&useSSL=false&serverTimezone=Asia/Shanghai&allowPublicKeyRetrieval=true
    username: root
    password: root
    # druid相关配置
    druid:
      max-active: 5000
      initial-size: 20
      min-idle: 5
      async-init: true
      # 监控统计
      filters: stat,wall
      filter:
        stat:
          log-slow-sql: true
          slow-sql-millis: 5000
        wall:
          config:
            create-table-allow: false
            alter-table-allow: false
            drop-table-allow: false
            truncate-allow: false
此段为MySQL的配置信息,修改url中的数据库名称username和password即可,程序使用druid连接,其他参数请自行参考
修改Redis配置
  # Redis配置
  redis:
    database: 0
    host: 127.0.0.1
    port: 6379
    password:
    timeout: 5000
默认安装的情况下,redis配置无需做任何修改,如果您对redis设置了密码请在password填入正确密码
默认database为0,您也可以修改成0-15的任意一个库来运行
理论上配置好以上两项程序即可正常启动了
文档转换配置
# 文档转换,请先安装LibreOffice,再配置相应路径,enabled=true
jodconverter:
  local:
    enabled: false
    office-home: /opt/libreoffice6.4
    max-tasks-per-process: 100
    port-numbers: 8100
文档转换默认是关闭的,即使不配置也可正常启动程序,详细配置请参考:安装Libreoffice
支付配置
# 支付配置
pay:
  # 支付实例,修改enabled为true则打开,false则关闭
  providers:
    - name: wechat
      enabled: true
    - name: alipay
      enabled: true
    - name: paypal
      enabled: true

  wechat:
    # AppId,通常为wx开头的18位左右字符
    app-id:
    # App秘钥
    app-secret:
    # 商户号,通常为10位数字
    mch-id:
    # 商户API私钥。商户申请商户API证书时,会生成商户私钥,并保存在本地证书文件夹的文件apiclient_key.pem中
    private-key:
    # API v3密钥。为了保证安全性,微信支付在回调通知和平台证书下载接口中,对关键信息进行了AES-256-GCM加密。API v3密钥是加密时使用的对称密钥。商户可以在【商户平台】->【API安全】的页面设置该密钥。
    api-v3-key:
    # 证书序列号。每个证书都有一个由CA颁发的唯一编号,即证书序列号。如何查看证书序列号请看这里 https://wechatpay-api.gitbook.io/wechatpay-api-v3/chang-jian-wen-ti/zheng-shu-xiang-guan#ru-he-cha-kan-zheng-shu-xu-lie-hao
    mch-serial-no:
    # 支付回调地址
    notify-url: https://yourdomain.com/api/pay/wechat/notify

  # 支付宝支付
  alipay:
    # 应用ID,您的APPID,收款账号既是您的APPID对应支付宝账号
    app-id:
    # 商户私钥,您的PKCS8格式RSA2私钥
    merchant-private-key:
    # 支付宝公钥,查看地址:https://openhome.alipay.com/platform/keyManage.htm 对应APPID下的支付宝公钥。
    alipay-public-key:
    # 服务器异步通知页面路径  需http://格式的完整路径,不能加?id=123这类自定义参数,必须外网可以正常访问
    notify-url: https://yourdomain.com/api/pay/alipay/notify
    # 服务器同步通知页面路径  需http://格式的完整路径,不能加?id=123这类自定义参数,必须外网可以正常访问
    return-url: https://yourdomain.com/api/pay/alipay/return
    # 签名方式
    sign-type: RSA2

  # Paypal支付配置
  paypal:
    mode: sandbox
    app:
    secret:
    return-url: https://yourdomain.com/api/pay/paypal/query
    cancel-url: https://yourdomain.com/api/pay/paypal/cancel
    # 该标签将覆盖PayPal网站上PayPal帐户中的公司名称
    brand: 云帆互联
考试系统支持微信和支付宝支付,用于课程付费、考试付费、题库付费等业务,如果您的程序版本不包含付费功能,则无需配置
基础配置
# 基础配置
ycloud:
  # 运行模式,ture为演示/false为正式
  demo: false
  # 允许跨域调用的域名,有安全要求的请配置,如:https://exam.yfhl.net
  allowed-origin: '*'
  # 开放接口秘钥
  open-secret: JoQEJeD7grF8JdyVaOCvPDNL8arsyvfL
  # 微信登录成功以后,将token推送到这个链接同步登录
  login-sync-pc: https://yourdomain.com/sync?token={token}
  # 微信登录成功以后,将token推送到这个链接同步登录
  login-sync-h5: https://yourdomain.com/pages/login/sync?token={token}
基础设置,生产环境demo请固定设置为false,yourdomain.com表示您自己访问考试系统的域名或IP
其他配置
# 生产环境建议关闭文档
# 文档访问地址:http://localhost:8101/doc.html
swagger:
  enable: false

logging:
  level:
    root: error
  # 日志文件目录
  path: logs/${spring.application.name}/
生产环境应该将swagger关闭,这样就不会暴露接口文档;日志等级按需设置,一般生产环境使用error或info等级,这样不会产生大量日志文件占用服务器空间,如果您需要更详细的日志,可以将级别设置为debug
配置Nginx
我们使用nginx做反向代理,通过同域代理来配置来运行考试系统,即所有服务运行在同一个域名下
移动端用户访问自动代理到移动端页面
PC端用户访问自动代理到PC端页面
访问接口自动代理到后端处理
创建考试配置文件
vi /etc/nginx/conf.d/exam.conf
exam.conf内容如下
server {
        listen       80;
        # 域名绑定
        server_name  exam.yfhl.net;
        # https证书相关配置
        listen 443 ssl;
        ssl_certificate /data/ssl/8216221_exam.yfhl.net.pem;
        ssl_certificate_key /data/ssl/8216221_exam.yfhl.net.key;
        ssl_session_timeout 5m;
        ssl_ciphers ECDHE-RSA-AES128-GCM-SHA256:ECDHE:ECDH:AES:HIGH:!NULL:!aNULL:!MD5:!ADH:!RC4;
        ssl_protocols TLSv1 TLSv1.1 TLSv1.2;
        ssl_prefer_server_ciphers on;
        # 服务器端获取真实IP
        proxy_set_header X-Real-IP $remote_addr;
        proxy_set_header Host $host;
        # 如果需要带上端口,请使用下面这段
        # proxy_set_header Host $host:$server_port;
        proxy_http_version 1.1;
        # websocket通信要求开启
        proxy_set_header Upgrade $http_upgrade;
        proxy_set_header Connection 'upgrade';
        # 文件上传配置,可以按需求改大改小
        client_max_body_size 2000m;
        # 开启GZIP压缩,加速访问速度
        gzip on;
        gzip_min_length 10k;
        gzip_comp_level 6;
        gzip_vary on;
        gzip_types text/css application/javascript application/x-javascript image/jpeg image/gif image/png;
        # http强制跳转到https
        if ($scheme = http) {
            return 301 https://$host$request_uri;
        }

        # 默认为PC端静态页面
	    set $dir '/data/run/dist';

        # 如果是手机端访问,则使用手机端页面
        if ($http_user_agent ~* (mobile|iphone|ipad|android)){
            set $dir '/data/run/h5';
        }

        # 动态决定到手机端还是PC端
        location / {
            root $dir;
            try_files $uri $uri/ /index.html last;
        }

        # 接口代理到后端处理
        location ~/(api/|upload/|druid/){
            proxy_pass http://localhost:8101;
        }
}
申请SSL证书
如果考试系统需要使用人脸识别、摄像头截屏、录音等功能,则必须使用https协议,这是由浏览器安全协议决定的,必须走https才能正常地使用视频、音频服务; 如果是内网部署使用IP访问则无法使用这些功能,必须使用域名+SSL证书才可以,目前不少云服务商都提供免费的证书申请;
阿里云: https://www.aliyun.com/product/cas
腾讯云:https://cloud.tencent.com/product/ssl
# 将证书上传到服务器的任意位置,然后修改以下配置为正确地址
listen 443 ssl;
ssl_certificate /data/ssl/8216221_exam.yfhl.net.pem;
ssl_certificate_key /data/ssl/8216221_exam.yfhl.net.key;
如果您不需要https访问,将以下内容删除即可
# https证书相关配置
listen 443 ssl;
ssl_certificate /data/ssl/8216221_exam.yfhl.net.pem;
ssl_certificate_key /data/ssl/8216221_exam.yfhl.net.key;
ssl_session_timeout 5m;
ssl_ciphers ECDHE-RSA-AES128-GCM-SHA256:ECDHE:ECDH:AES:HIGH:!NULL:!aNULL:!MD5:!ADH:!RC4;
ssl_protocols TLSv1 TLSv1.1 TLSv1.2;
ssl_prefer_server_ciphers on;
刷新配置
nginx文件修改以后,需要刷新配置文件才能生效
# 刷新nginx配置
/usr/sbin/nginx -s reload
添加系统服务
配置好以后,我们可以使用java -jar命令来启动服务,如:
# 进入项目目录
cd /data/run
# 运行命令,退出命令行服务则终止
java -jar yf-exam-api.jar --spring.config.location=application-local.yml
# 后台运行,退出命令行服务也可以正常运行
nohup java -jar yf-exam-api.jar --spring.config.location=application-local.yml&
以上命令适合调试和临时运行,对于生产环境来说还是不太稳定,即便使用后台命令也容易停止服务,所以我们建议把他配置为系统服务启动
新增配置
# 进入服务目录
cd /usr/lib/systemd/system/

# 创建新文件
vi exam.service
创建新的配置,内容如下
[Unit]
Description=Exam
Wants=network-online.target
After=network.target

[Service]
Type=simple
WorkingDirectory=/data/run
ExecStart=/bin/java -jar /data/run/yf-exam-api.jar --spring.config.location=/data/run/application-local.yml
Restart=on-failure
RestartSec=10

[Install]
WantedBy=multi-user.target
保存配置文件
刷新配置
# 刷新配置
systemctl daemon-reload

# 启动服务
systemctl start exam.service
设置开机启动
systemctl enable exam.service
其它操作
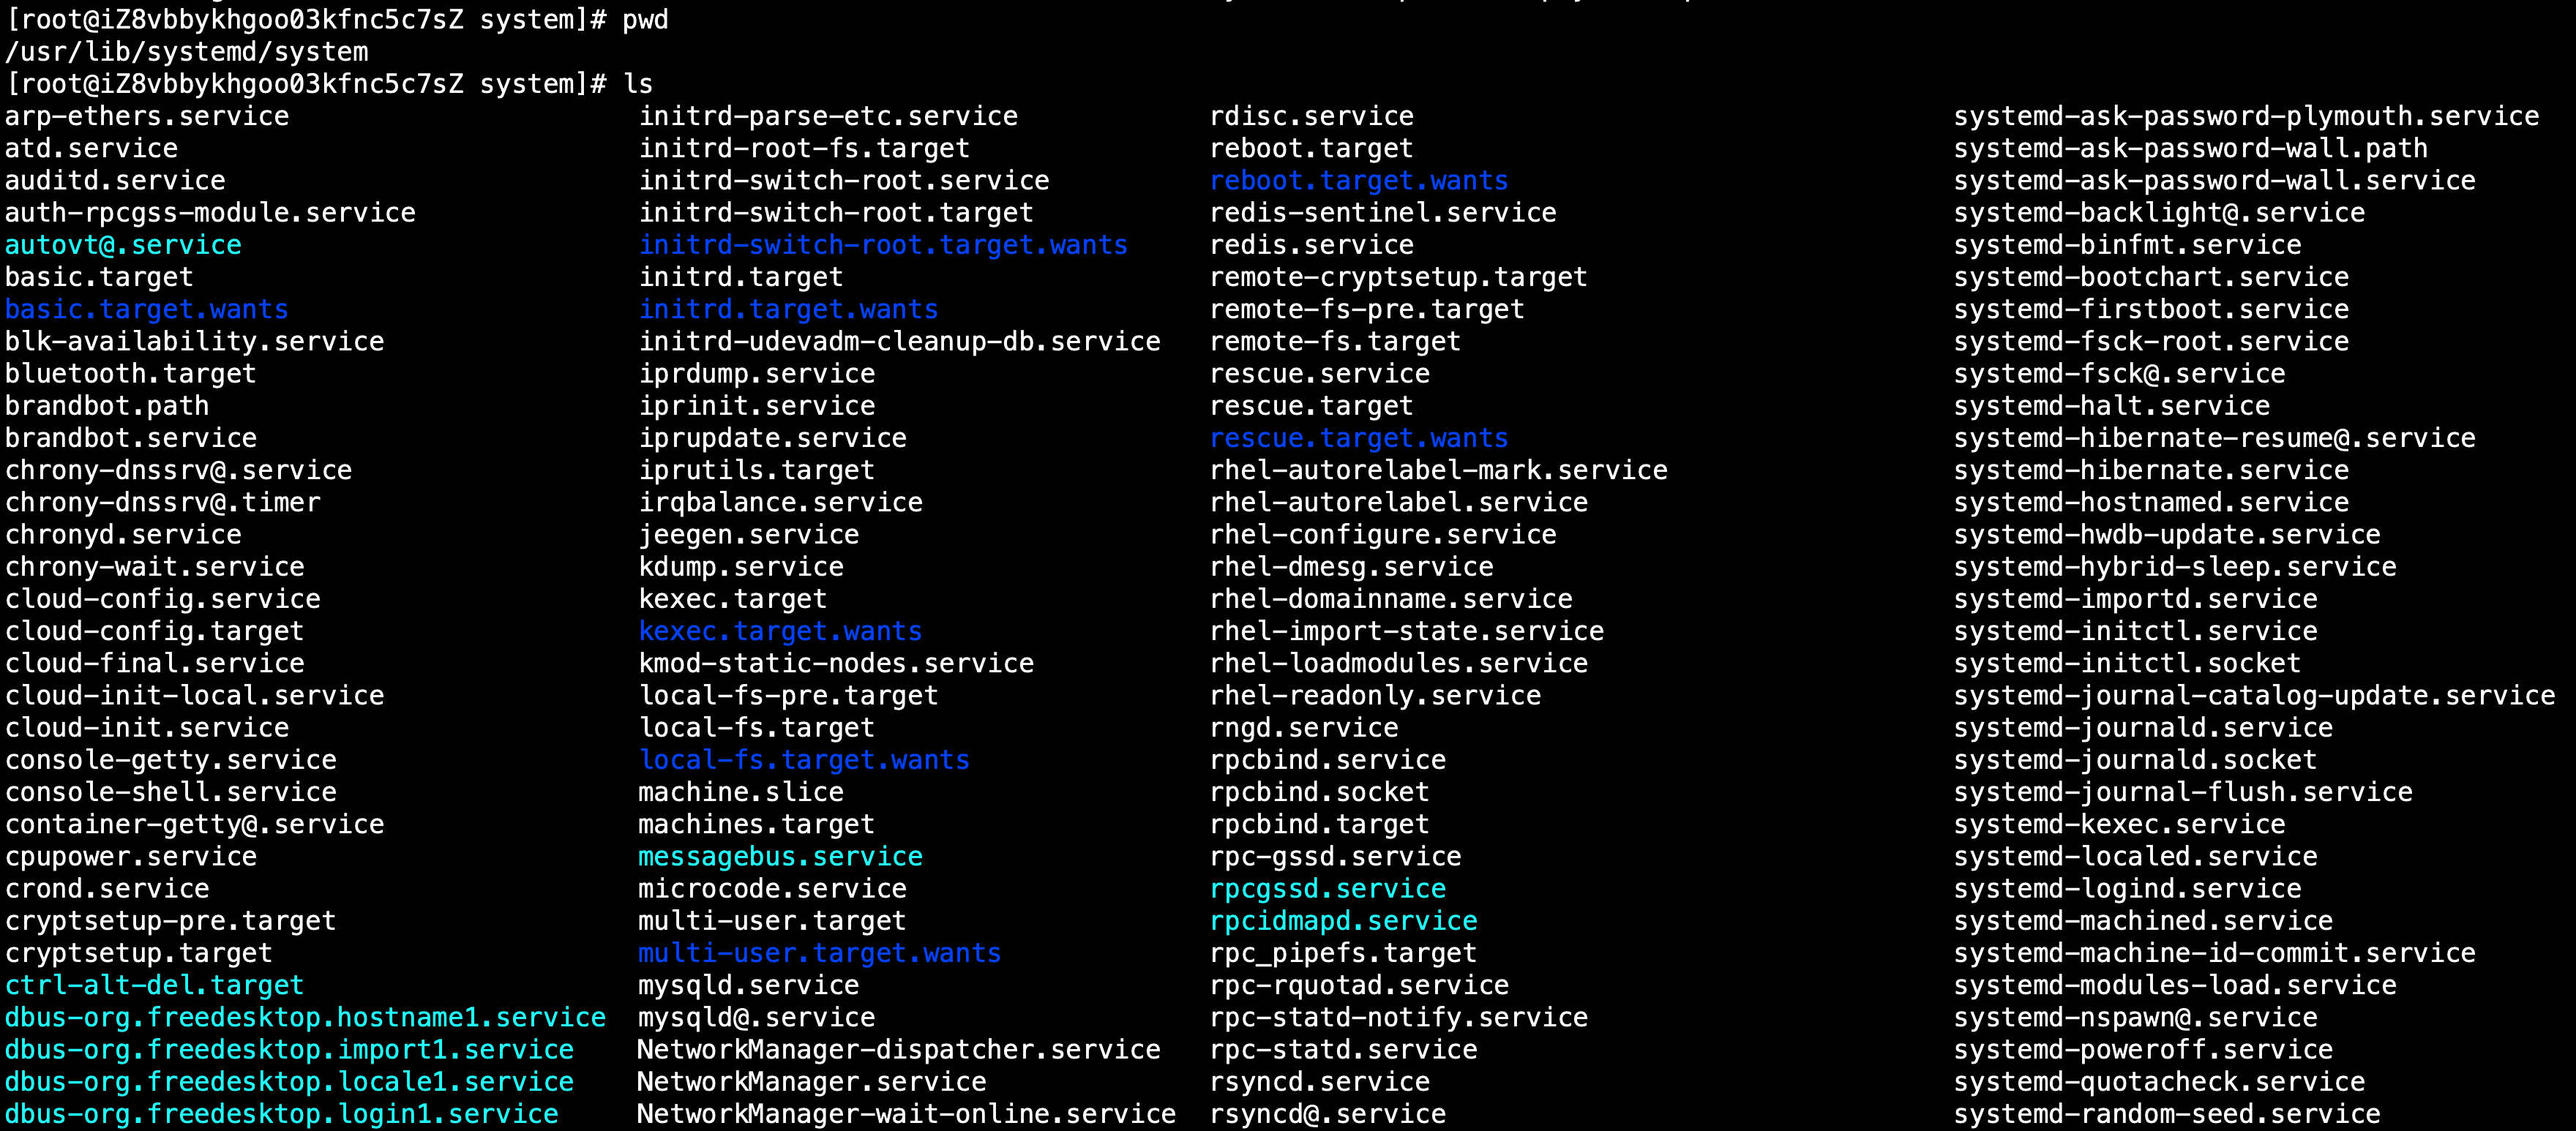
/usr/lib/systemd/system/ 目录下为所有可用的服务文件,都可以使用systemctl start|stop|restart xxx.service来维护 
# 例如,启动mysql
systemctl start mysqld.service
# 例如,启动redis
systemctl start redis.service
# ...
安装Libreoffice
在上传Office课件时,格式有:doc,docx,xls,xlsx,ppt,pptx,程序需要将其转换成pdf格式,才能实现在线查看和预览。 在导出考试记录存档时,需要将考试记录打包为pdf格式,如果无此组件则无法正常导出。
如果您购买的版本包含【课程模块】,且存储方案为【本地存储】时,理论上必须安装,除非您不使用Office类型课件;
如果您购买的版本不含【课程模块】,且不需要导出考试记录,则无需安装;
课件转换组件支持两种,分别为LibreOffice和OpenOffice两种,两个安装一个即可,本文推荐使用LibreOffice;
插件下载
进入 LibreOffice 官网:https://www.libreoffice.org/download/download/
请根据您的服务器类型来选择下载包,本文使用 CentOS,下载:Linux(64-bit) (rpm)
下载好的文件名为:LibreOffice_6.4.7_Linux_x86-64_rpm.tar.gz说明:您也可以下载更高版本的文件,安装方式类似
组件安装
将下载好的 LibreOffice_6.4.7_Linux_x86-64_rpm.tar.gz上传到服务器的任意位置,本文将组件放置位置为: /home/LibreOffice_6.4.7_Linux_x86-64_rp m.tar.gz
# 解压文件
cd /home
tar -xvf LibreOffice_6.4.7_Linux_x86-64_rpm.tar.gz

# 安装组件
cd /home/LibreOffice_6.4.7.2_Linux_x86-64_rpm/RPMS/
yum localinstall *.rpm -y
获取配置
进入系统/opt目录,可以看到 libreoffice6.4 文件夹,此文件夹的路径则是程序 要的 OfficeHome,完整路径为:/opt/libreoffice6.4 (注意,不同版本和不同 系统,此文件夹的位置都不一样)
Linux 系统一般为:/opt/libreofficex.x
MacOs 系统一般为:/Applications/LibreOffice.app/Contents
Windows 系统一般为:C:/Program Files/LibreOffice
配置程序
打开我们的配置文件:/data/run/application-local.yml,找到以下配置:
# 文档转换,请先安装LibreOffice,再配置相应路径,enabled=true
jodconverter:
  local:
    enabled: false
    office-home: /opt/libreoffice6.4
    max-tasks-per-process: 100
    port-numbers: 8100
将enabled修改为true
将office-home修改为配置好的地址,如:/opt/libreoffice6.4
max-tasks-per-process:任务最大进程数量,可以修改为100-500的值
port-numbers 默认 8100,也可以修改成其他的
配置好以后重新启动考试后端
systemctl restart exam
乱码解决
如果服务器上没有中文字体,那么在转换带有中文的文档时,极有可能出现乱码,解决方法就是下载字体包
# 进入字体目录
cd /usr/share
# 下载字体包
wget https://cdn.yfhl.net/fonts.tar.gz
# 解压字体包
tar -xvf fonts.tar.gz
启动异常处理
在做了以上操作以后,仍然无法正常转换文档,试试以下命令
yum install ibus